Local symbols
The Local symbols library includes the most frequently used graphics. You can also create symbols and add them to the project local library. Symbols can just be a static image or they can have dynamic properties and tags links.
To view the symbols used by project:
Do one of the following:
•To see only the symbols used in this project, go to Draw > Symbols. In that page you can export, import or delete symbols.
•To see all available symbols, go to Draw > Drawing, and click Open Symbol Library
Creating new Symbols
You can use the drawing tools and the COMBINE commands at the horizontal toolbar to draw your own symbols.
You can also bring symbols from Symbol Factory and click at the UNGROUP command at the horizontal toolbar, in order to edit the imported symbols. You can also use the “Direct Selection” cursor to edit internal elements without needing to ungroup.
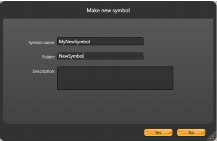
If you want to save the new symbol to the Local Symbols Library, just select the object or objects that you want to be the part of the symbol then right-click and select “Make a new symbol”.
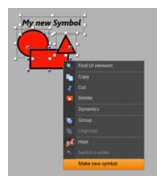
•Enter the Name, Folder and the description of the Symbol.
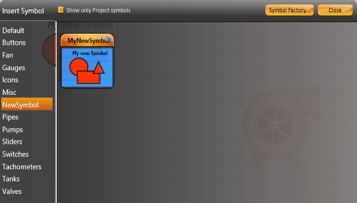
•Now you can open the Symbol Library and choose the symbol to use at your displays.
The components in the Local Symbol library may have built-in dynamic properties and an easy way to map it to realtime tags in your application. That is explained in the following section.
If you have dynamic properties and tags being used in that symbol, the system will automatically create the symbol label parameters. After making the new symbol, double click at it to verify its configuration parameters.
 Note:
Note: In order to Edit a symbol that is already in the Local Symbol library, insert the symbol in a display, right click on the symbol, and select “Edit Symbol”, that will change the drawing tool, locking the other elements in the page, so you change the symbol. When you finish, right-click at any position to select Save to Library, Save Only to Local display, or Cancel your editing.
The objects from “Local Symbols” are composed by some default symbols from the file SymbolLibrary.tproj, added with the product installation, and the symbols you created to your specific project. If you change, delete or insert a symbol in the SymbolLibrary.Tproj, it will be accessible to all projects in that computer. The symbols you are using in your project are saved inside the PROJECT file, therefore completely independent of any external file.
Inserting a Local Symbol.
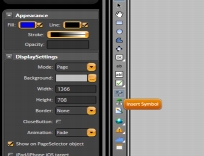
•Go to the Draw Environment, right-click any place of the screen and select “Insert Symbol” or you can click on the “Local Symbol icon” on the vertical toolbar.
•
•After selecting the category and symbol, click on the symbol and then click on the screen to position the symbol, you can also drag-drop symbols to the screen. If you double-click at a symbol, that will close the Library window, allowing you to insert the selected object.
•Double-click on the symbol to see its runtime properties and map to tags in your application.
•Note: Some symbols do not have custom parameters, in this case, the double click will show the Dynamics dialog.
Symbol Parameters
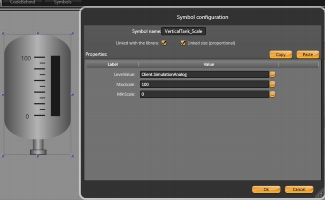
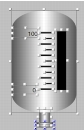
When you insert a symbol from the Symbol Library it may some parameters, like in the example the VerticalTank symbol has the parameters LevelValue, MaxScale and MinScale. To change the linked tags to those parameters, just edit the new tag names in the dialog.
Editing and modifying symbols
Right-click on the VerticalTank symbol and select Edit Symbol. Now you enter in the Edit mode, you can see all objects that are part of the Vertical Tank.
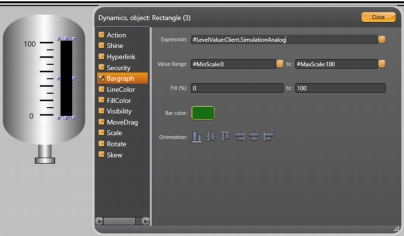
Click on the Black rectangle to see its Dynamics.
As you see we use #<PropertyName>:TagName
That syntax will create exposed label parameters for the symbol, making it easier to map the linked tags when using the symbol. In this examples, the symbol has the labels “Level”,“MinScale” and “MaxScale”. When you insert this symbol, you will be able to set values for those parameters. After the “:” character, you have the default value.
Example.: “#LevelValue:Client.SimulationAnalog”, we are creating a property called “LevelValue” which has “Client.SimulationAnalog” as the default value.
You can use any name for the Label parameter.
 Tip: When creating symbols, it is useful to initially map the properties to client.SimulationDigital, Client.SimulationAnalog or Client.SimulationDouble, which are variables with values changing every second so you can see the result of your dynamic properties. You can use the internal variables Client.DigitalValue, Client.NumericValue and Client.TextValue, when you just want to put a placeholder value, with no built-in simulation.
In order to save the symbol, right-click on the symbol or on the display and press Save to Symbol Library, or click the Save icon on the top toolbar. Double-click on the symbol to verify its properties.